How To

A lot of the time travel guides will tell you the most popular places to see, eat, dance, play, drink, even a brief history lesson around the place, telling you why it’s worthwhile to visit.

But rarely do I see them telling you what to bring.

Especially if you’re new to the game of travel, packing can be a daunting task. Whether you’re moving into a hotel for a week, a dorm for a year, traveling with work for a month, or moving to a new home there are ways to make things easier on yourself. Here are some tips for efficient packing.

1) Boxing

If you’re boxing your things, I recommend first checking your local grocery store to see whether they just got any shipments in. They’ll most likely have collapsed cardboard boxes they’re willing to give you. Once you have your boxes, your first step is to gather materials. You’ll most likely need:

  • Packing tape
  • cling wrap
  • paper
  • bubble wrap

Note: DO NOT USE STYROFOAM PACKING PEANUTS! They do not provide the padded protection they promise. They’re only an extra hassle to clean, while being made from one of the most harmful materials to the environment made by man.

Instead, gather your clean linens, including towels, comforters and mattress pads. As you pack a box with fragile items use them to pad each individual dish and glass. The key to optimizing this protection is to keep each object from touching each other, as well as the walls or floor of the box. As you pack the box, periodically shake what you’ve packed, gently. Listen for any clinking sounds, and if you hear them, find which things touched and add extra padding between them. As long as you don’t hear any sounds of fragile material hitting fragile material, you will not unpack the
 box to find anything broken.

When taping a box, particularly if it’s heavy, don’t just tape the seams. The weakest points of the box’s floor are halfway between the edges and the center seam. Taping these parts of the bottom of the box, making it so there are three strips of tape at the bottom of each one, reinforces the box.

Delicate decor such as china and porcelain should be wrapped in bubble wrap. Paintings and posters should be wrapped in cling wrap. If you’re soliciting the help of professional movers and would prefer privacy over more valuable items, they can be wrapped in packing paper.

2) Packing a Car/Trailer

If you’re packing a car or a trailer put boxes with more fragile contents, oddly shaped objects, and heavier boxes towards the front. The front experiences less shifting while turning. Lighter boxes should be put towards the back.

3) Packing a Suitcase

To save space in your suitcase, fold your clothes in half the long way, then roll them into cylinders. Keep toiletries separate in a plastic bag. A shower caddy is often useful for not forgetting anything in your temporary space. If you’re traveling by plane, be sure your toiletries are either in a bag you plan to check, or are in travel-sized bottles. If you’re packing light in order to save money on checking for an overseas trip, you can find travel sized toiletry bottles marked TSA approved on Amazon.

4) Traveling with Pets

There is always a risk to traveling with pets, even if they are seasoned to being in a car. Bring all of their normal food, water and treats, as well as a leash, and bags and bags and towels for any leavings. You should have sealable bags to prevent smell, and if it’s a short trip, of course take them outside before you leave, for less chance of an issue later.

If you are traveling with a pet on a plane make sure you’ve called your airline beforehand to understand their regulations. There are TSA Approved travel kennels available at PetSmart. Be sure to have trained your pet to be comfortable in this crate long before travel, and consult your vet on whether they believe your pet might benefit from an anti-anxiety medication for the ride. If you would like more assurance of safety, organize your pet’s trip plan with an organization like PetRelocation.

5) Settling Into a Hotel

There is a luggage rack in every hotel room closet to store your suitcase. I don’t recommend putting your clothes in the dressers, both because you’re less likely to leave them behind after the trip and because I don’t always trust the dressers’ cleanliness. In the same vein, before sleeping, lift the linens off of one corner of the bed. If there is any blackness in the corner of the mattress, there are bedbugs, and you should ask to be moved rooms immediately.

I hope these tips help make your trip more enjoyable!


How To

How to make a travel guide

Over the years of studying in the US, I’ve gradually reached a state where my body and mind always have one on the road. I generally divide my trips into three parts: before, during, and after the trip. Of these, pre-trip strategy development can feel the most vital sense of happiness. During the journey comes second, after all, because of the travel and exhausting photography. After the trip, it’s even more painful to write a travel journal and process photos.
I’m going to talk about my pre-trip strategy. Because I am a severe obsessive-compulsive disorder, in Japan due to:
1) Can’t drive.
2) Transportation inconvenience.
3) Japanese transportation to the minute, the travel schedule is also everything, every minute what to do is strictly listed.
Without further ado, here’s how I’ve planned and arranged my travels over the years (based on my travels in Japan)

About the destination: the wish list.
A temperate island nation like Japan offers four distinctly different seasons. If you’re looking for quality travel, you have to be in the right place at the right time. That’s why the heart is on the go because on weekdays, you will probably learn about some destinations of interest-based on resources such as friends, public, news, travelogues, etc., and know what seasons are beautiful, when these places have special celebrations, etc. For example, the red leaves and cherry blossoms in Kyoto, the snow festival in Sapporo, the tree ice in Zao, the sea of clouds in Takeda Castle, the whales and sea turtles laying eggs in Okinawa, and so on. Once you probably have a first impression, put these on your wish list!
Tibetan King Tree Ice, February/March each year
Izu Kawazu Cherry Blossoms, end of February
Shirakawa-go in winter, January

Appropriate time.
Vacations/cheap airfare, transportation costs, etc. With a wish list, it still takes a deed to make a trip happen.
A: For working people, holidays are naturally the most crucial impetus. The public holidays are overcrowded. You can play badminton on the highway; it is essential to avoid the peak traffic and choose to go to some niche but very sentimental spots or choose the right time to take a vacation.
B: For poor students or freelancers, the first must be saved save! The cost of transportation in Japan is outrageous. The ability to make the perfect journey at the best price becomes a skill test.
We can choose to redeem our miles for airline tickets. Secondly, we have the option of cheap airline tickets. We can also opt for the select Shinkansen tickets. The Shinkansen’s affordable tickets are for short-term visitors (less than three months of visa), which is not the case for long-term residents. If you can’t afford the Shinkansen, you’ll have to stay young. The night bus is a very suitable choice, and the bus sits on the sleep overnight, transportation, accommodation are saved, the best of both worlds. There is also a special seasonal train ticket in Japan. The Seishunjuju Ticket: This ticket is offered every year during spring, summer, and winter vacations and costs only 2,370 yen for one day of travel on any JR train. This ticket is ideal for long-distance travel with plenty of time to spare and should be used in conjunction with transportation to your destination.

Related attractions: Hand-drawn maps.
Now that you have your destination and motivation, it’s time to plan your itinerary. The first step is to find out what specific sights and experiences you’ll enjoy at your destination. Naturally, this involves looking up information and roughing out the attractions. After the rough selection, arranging the route and picking up the interests becomes the key to making an excellent travel plan. My experience is to roughly draw a map on a blank piece of paper and then roughly mark the locations of these approximately selected attractions based on tools like Google Maps (you can also keep them directly on your computer/phone). See which interests can be arranged together and which ones have to be discarded.
Of course, because every trip has a time limit, it’s impossible to have every desired attraction, which needs to be endured. Of course, you can also learn deep well ice as I arranged the trip to solve the math problem, column six or seven scenarios, and then try to choose the best solution – I naturally enjoy it. Still, I have to admit, and it takes a lot of energy. In the meantime, for the foodie, it is necessary to do your homework in advance for specific cuisines, which will be introduced by significant guides and websites. For example, in Japan, check the Tabelog ranking.

Details about transportation.
Once you’ve decided, you’ll need to find out how to get to the places you want to visit. The most convenient way is to check the website of the attraction. In Japan, this is a good idea for tourist attractions, as it provides clear information on how to get there by car, train, and bus.
Once you’ve planned a general route based on the mode of transportation and location, it’s time to check if there are any local special fares.

We take care of the smallest details of your trip.
Reserving tickets, transportation, and accommodations is a lot of work. Still, preparation is essential to ensure a safe trip, and there are many discounts available if you book online in advance. Although mobility is limited, many hotels can be canceled if there is a last resort (heavy rain, typhoon, or other natural or human-made disasters). Finally, pack your power supply, clothes, umbrella, documents, camera, tripod, notebook, stamp book, whatever you want to bring.

How To


Anyone who has ever been tent camping knows that while there is much to be gained from spending time in the great outdoors, setting up a campsite can be a bit of a hassle. We all know the relief of turning off a windy mountain road onto a narrow gravel loop, looking for an ideal site, and then getting out of the car for the first time in several hours and taking the first breath of fresh mountain air. But, the journey isn’t over yet. You’ve got no place to sleep, no way to cook, and no place to relax. Now, the tent needs to be assembled, sleeping pads and sleeping bags need to be unrolled, inflated, and arranged, and duffel bags need to be situated at the appropriate heads and feet.

However, road trips and other similar long-distance drives may require driving to a new campsite every, or near every night, which means the set up and take down process has to become a part of the everyday routine. One solution to this is simply to own an R.V., camper van, or even a car that can be converted into a comfortable sleeping arrangement which can eliminate some or all of your daily set up requirements. However, if you don’t have access to a vehicle of this kind, there are still some things you can do to ease the daily burden.

1. Keep Things Together– put cooking supplies together, cleaning supplies together, and sleeping supplies together. This way you know where everything is, and can minimize the time spent ruffling through the car looking for things. If you are able to, consolidate these supplies for easy carrying. For tents and sleeping bags, I recommend a large Ikea bag that can fit everything you need to sleep, and can be taken directly out of the car to the campsite, and then back again the next day. This also helps with organization. A smaller bag or box is also helpful to keep your kitchen supplies together.

2. Use the car as part of the camp. Only take what you need to sleep and eat that night out of the car. Don’t bring out all the food, or even all of your clothes, especially if you are able to park near enough to the campsite that going to and from the car is easy. If you have space that isn’t used for passengers while driving, use part of your back seat as a pantry of sorts, where you can keep all cooking supplies in some sort of easily accessible order (orderly chaos counts).

3. Don’t bring too much, and rely on your environment. On more stationary camping trips, things like camp chairs, hammocks (not used for sleeping), and any other assorted campsite accessory may be a nice addition. But, I find that if you don’t need it, it isn’t worth setting up, taking down, and packing away every day. Most camp sites have picnic tables, and if not, you should already have a tarp or some sort of sleeping pad/ mat for sleeping, and honestly, sometimes the ground is better than a chair.

4. Get into a routine– Once you set up enough campsites in a short enough time frame, you fall into a very ‘just get it done’ mind set. If one person is better at setting up the tent, it is probably more efficient that they start with that while the person who is best at cooking sets up the stove, and another pays for the site, or does anything else that needs to be done. If one person needs help, everyone helps. Eventually kinks get worked out, and you find yourself setting up in record time.

5. Pack Efficiently, and with set up in mind. It is often tempting to crumple everything up and throw it in the car, but messy packing will only make set up that evening all the more difficult. So, pack with your future self in mind. Put the tent away so that the things you need first when setting up are on top of the bag. Put everything back where you had put it before, try not to just throw things in the car. And for the love of god, do your dishes. You will have to do them eventually, I promise.

How To

Traveling internationally is an experience of a lifetime. During a global pandemic, it may be harder to book flights, but once it’s over, the world is waiting to be explored. Adventuring to different countries and cultures is eye-opening and life changing. It allows you to over all immerse yourself in a completely different world. Travel requires a lot of preparation, but don’t let this overwhelm you as it will all be worth it in creating an enjoyable trip. Here are some things to allow for an easier trip overseas:

  • Passport

When traveling outside of the United States you will absolutely need a passport. If you don’t have one then you can’t leave. When applying for a passport, make sure to do it in advance before your trip to eliminate excess stress. The process doesn’t take too long, but doing it at the last minute isn’t the greatest idea. During  your trip, keeping your passport safe is crucial as it will be your ticket in and out of the country.

  • Basic Flight Etiquette

Knowing the basic rules of international flying is a key piece of information. For example, many countries allow you to stand up and grab your bags before the plane has even touched down. This process causes lots of anxiety so be sure to bring a bag that can go underneath the seat in front of you to avoid searching the upper compartments. Many international flights serve main meals like breakfast, lunch, or dinner when flying because of time changes, which is great so you don’t have to pack an entire meal, but maybe keep some snacks handy in case you get hungry.

  • Research, Research, Research

Learn about the culture of your destination. Knowing the rules of a specific country can save you lots of trouble when conversing with locals. Creating an itinerary is also another helpful way to bring out the best of your trip instead of wandering aimlessly. Some companies, to alleviate even more stress, provide city and countrywide tours. Rick Steves, Trafalgar, and more provide educational experiences when exploring your destination. Educate yourself on different locations and where tourists are most safe too adventure. Researching different restaurants and sites before your trip will simplify everything to avoid unneeded stress.

  • Currency

Many countries around the globe have different currencies and methods of paying. Be sure to learn more about your destinations primary currency. Some will take the U.S. dollar as well as their own money, but be sure to have your credit or debit card handy as this is the easiest method to pay anywhere you go. Knowing the best method of payment is a great way to avoid confrontation and sticky situations with locals.

When traveling to our desired destination we hope for an enjoyable time with friends and family. Keeping these things in mind and having a passport ready means you are well on track for you international flight. All that’s left is for you to go explore.

How To

Plan ahead

Planning ahead can get rid of a lot of anxiety make sure you check out Covid sites to see how the state you are visiting is handling Covid. This website will let you know which are the hotspots and it will even tell you county by county (https://covid.cdc.gov/covid-data-tracker/#cases_casesper100klast7days). 

Another way to plan ahead is to think about how you are traveling to your destination. While traveling by car might seems safer bt according to the CDC “Making stops along the way for the gas, food, or bathroom breaks can put you and your traveling companions in close contact with other people and frequently-touched surfaces.” (https://www.cdc.gov/coronavirus/2019-ncov/travelers/travel-during-covid19.html) but they say that it is safer and more efficient to ride a plane “Air travel requires spending time in security lines and airport terminals, which can bring you in close contact with other people and frequently touched surfaces. Most viruses and other germs do not spread easily on flights because of how air circulates and is filtered on airplanes. However, social distancing is difficult on crowded flights, and sitting within 6 feet of others, sometimes for hours, may increase your risk of getting COVID-19.”

Another way to plan ahead is to immediately get Covid tested as soon as you get to your destination. A lot of states/countries will have you quarantine until you get your negative test.

Anxious About Getting Covid During your Trip

Most states and countries do require to wear a mask and a lot of scientists have said that a mask will help prevent the spread of COVID-19, make sure you are wearing your mask and sanitize your hand frequently when you are not able to wash your hands which should be able to help keep the anxiety down.

Also, there are plenty of great COVID-19 safe activities to do when traveling Most of those require you to be outside but it should still be very fun to get out and see things that you’ve never seen. For example, if you come to Colorado hiking is a great way to adventure while still staying safe.

Find a Good Way to Cope With the Unknowns 

These are definitely scary times and the overwhelming fear of traveling during this Pandemic might become overwhelming but there are definitely find ways to cope with this. One way to cope with this is maybe to find a travel companion if you are going to travel with someone I do suggest it be someone in your own household. I choose to make my dog my travel companion and he is an emotional support dog so it also helps me to calm down when I get anxious. Another way to try to help with anxiety is to stay informed on Covid protocols and what the cases are looking like.

This is an incredibly difficult time, and it can be really easy to get caught up in all the mess of Covid but if you can stay home, stay home it is safer. But if you need to travel or are going make sure you do it as safely as possible.


How To

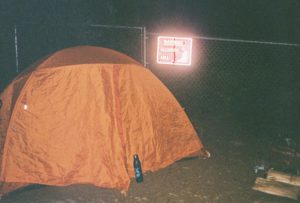
Pulling up to that small patch of open land in the middle of the forest can be riveting. You open the car door to the smells of damp Earth, evergreen, perhaps even remnants of a campfire. The sun sparkles through the trees and you think “this is what they mean by the great outdoors”. You may even begin to wonder why you don’t camp more often, until you remember– we have to set up that darned tent.

Setting up a tent can be frustrating. Whether it is your first time spending the night outdoors, you’re introducing your kids to the wilderness, or you are hoping to avoid a fight on that romantic outdoor getaway, we have all the tips to setting a tent without tearing your spirts down.

Woman takes a deep breath in the outdoors to relax
Take a deep breath. Credit: The New York Times
  1. Take a Deep Breath

Look around, remember where you are. Perhaps you are here to reconnect with nature and relax, or are maybe getting a good nights rest before a pack day of oudoor adventures. Either way, this tent is your home for the night. Setting it up can be a headache, but with your goals in mind, the process an go smoothly. Take a deep breath of mountain air and get ready to roll.

Little kid picks up sticks at the campsite
Gather sticks for the fire. Credit: GetOutWithTheKids.com
  1. Delegate

Before even toughing the tent, it might be a good idea to assign roles to everyone in your camping party. Tents rarely require more than two people to assemble so there is no need to over complicate it. If you have little ones running around or extra friends along for the ride, suggest they collect sticks around the campsite to start a fire later or have them unload the car to distract them. Now that it is just you and a partner, or if you are taking on this task solo, you can focus in on what needs to get done.

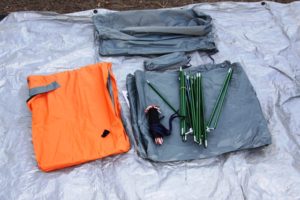
The items to build a tent include poles and tarp are laid out.
Items for tent assembly laid out. Credit: FreshAirJunky.com
  1. Locate all Items Needed for Tent Assembly

Tents typically include a ground mat, the tent itself, tent poles, a rain tarp, steaks, and instructions. Locate each of these items and lay them out in an easy to access location so you don’t have to scramble for them when you need them. Laying them out beforehand can help eliminate stress when each item needs to go into the tent.

Woman prepares to put a rain tarp over her tent
Putting on the rain tarp. Credit: NC State Parks on YouTube
  1. Get Down to Building

This is where those instructions will come in handy. Read them over once and then keep them nearby for reference. Generally, assembling a tent will involve setting down the ground mat, laying down the tent, inserting the tent polls, attaching the rain tarp, and securing the tent with steaks. However, each tent is unique and may have its own specific requirements. Remember, it is okay to rely on instructions or even a how-to site like WikiHow’s How to Set Up a Tent (With Pictures). When frustration arises, check back in with your instructions to get the job done.

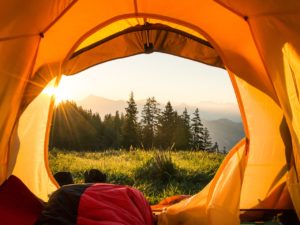
From the inside of the tent you see out into the mountains with a gorgeous sunset.
Relax in your newly set up tent! Credit: Self.com
  1. Celebrate Your Accomplishment

For many of us, setting up a tent is no simple feat. Whether the process went smoothly or had some bumps along the way, don’t forget to pat yourself on the back. If you set the tent up with a partner, thank them for their work. Now that the worst of it is over, you can sit back, roast some marshmallows, and crack open a beer by the fire. Relax, you’re camping now!

How To

The best thing about eggs is that they can be cooked in so many different ways. Sunny-side up, over easy, hard-boiled, the experience is different every time. Right now, things in this world are a bit messy and eggs may not be at the forefront of everyone’s mind.  However, I’m going to show you how we can borrow some of that craziness from outside, and put it to good use in our kitchen. I call this egg recipe: The Pandemic Scramble.

  1. Find Good Eggs

First things first, not all eggs are created equal. I believe that a happier chicken makes a happier egg, so buy those cage-free cartons when you can. There are a lot of cheap eggs out there, but why not treat yourself and spend an extra dollar for an “Eggs-qusite” taste. Think of your egg selection as the people you are choosing to spend your time with during these months. A good egg will crack its shell open for you and allow you to do the same. They have the protein and nutrition to support you during these tough times, and you will in turn protect them from breaking. Covid-19 may have limited the eggs that we have available to us, but just remember that good eggs back home are always a phone call away. I’m sure you can send eggs in the mail nowadays anyway.

Happy Chickens

2. Crack the Shell and Whisk it up

One has to be careful here, after all this is the most delicate part of the whole operation. Use a hard edge to crack the egg and then gently peel away the shell. Pour the yolk into a bowl and make sure none of the shell pieces fall in. Whisk up the eggs until the yolks have all been pierced and the mixture is a homogenous yellow.

Like the eggs, our lives are being scrambled up at the moment, but oftentimes this will reveal our true colors.

3. Slow-Cook

Use a non-stick fry pan because the Pandemic Scramble gets a little messy. Add some butter as a further measure to prevent the eggs from sticking. If you don’t have a non-stick frypan, use even more butter. Once you have a nice golden-brown coating, it is time to pour in your eggs. Immediately set your stovetop as Low as it can go. We want to cook the eggs slowly so we can get that desirable soft and creamy texture. Constantly stir during this process. Every 30 seconds or so, turn the heat up to a 3 or 4, just below medium, and continue to stir. Allow the eggs to cook at this temperature for no more than 10 seconds, then return back to Low. Continue altering between Low and Medium until the eggs begin to solidify.

This is a long process but it is necessary. Perhaps use the extra time to call a friend or family member. I’m sure they’d love to hear from you and learn about the Pandemic Scramble themselves.

After seven or eight minutes your eggs should finish solidifying and look something like this: https://savorysweetlife.com/gordon-ramsay-scrambled-eggs/

Delicious right? At this point in the recipe, you should have already connected with a loved one and made some killer scrambled eggs. Not a bad start to the morning.

4.  Eat Papa, Eat!

Eat Papa, Eat

This is my favorite part of the experience. I personally like to add hot sauce, salt, and pepper but I would never judge anyone for doing otherwise. Hopefully, you have someone to share these eggs with, after all, they took some love to make. It’s important to remember that despite how scrambled our world is right now, the little things can still help makes our days “eggs-tra” special.

Enjoy!

How To

With the pandemic and the election and everything else that 2020 has thrown at us so far, it’s important to remain positive and hopeful. Even though the future is the biggest mystery of all right now, we can still daydream about what we’re going to do when we can be in gatherings of more than 5 people without masks on. One thing I’ve been daydreaming of these past few days is concerts! So, as we prepare for future adventures, here’s a guide to enjoy your first concert fresh out of the pandemic…

Set aside the entire day to have fun!

Although most concerts take place in the middle of the week and most people have work or school commitments, try to see if you can take some time off in the afternoon to prepare for your concert! It’s nice to not have a tight-schedule, and that way you can spend your time getting ready and excited.

Wear something fun!

Part of that prep time should be picking your outfit for the night! Even if you don’t like getting “dressed up,” make sure you wear something you’re comfortable and happy in. I personally enjoy wearing a variety of outfits – ranging from a nice top with sparkly shoes to a unicorn onesie and my old Converse. Artists love looking out into the crowd to see the fans embracing the night with themed costumes and/or coordinated outfits!

Make something!

In a big venue, I would suggest making your own poster with some play on words of your favorite song. In a smaller theatre, you can do the same thing but make it smaller, along the lines of an 8×11 piece of paper. Again, artists love looking out into the crowd to see people really appreciating them and their work, and they want to get to know all of their fans! Even making a sign that says it’s your first show is something that will make the artist so happy to see. Just be mindful of the people around you, so don’t hold it up during the whole show.

Travel lightly, but pack the essentials!

When you’re dancing the night away, you’re not going to want to worry about holding your bag. So, either rock the stylish fanny-pack or keep things in your coat pocket!

In your fanny-pack or pocket, you’ll need a few things. No matter how good your cell’s battery life is, bring an extra charger/power bank. The last thing you want is to be separated from your friends in downtown Denver with a dead phone, so just bring the charger! Also remember your wallet, and preferably bring cash. After having a fantastic night, you’ll probably want a t-shirt or poster to commemorate it all, and some merch booths only take cash.

The most essential item you should have on you seems obvious, but forgetting it happens. You’ll need your ticket! Whether that’s a screenshot of the QR code you received in an email, or a printed copy, your night is going to be cut short if you forget this key element.

Remember to put down the phone!

Yes, you’ll want to take pictures when the artist goes to the side of the stage closest to you. But just remember that those are just pictures, and you’re there for the memories! I usually record one song and take a few pictures, and then simply enjoy the rest of the night.

Now that you’ve learned the basics, you are ready for your first concert post-COVID! So, make sure to wear a mask and maintain social distancing so that this can happen in the near future!

How To

Hopping in the car to travel somewhere new leads to unlimited opportunities to adventure on your own timeline. It allows one to explore and experience the entire journey, adding so many memories to a trip that would have been skipped over if exchanged for a 3 hour long plane ride. Though there are many perks of a road trip,  for a first timer packing a few weeks worth of your life into a car can be a daunting and disorganized task. If you don’t know where to start, follow this guide to packing more efficiently and staying organized your whole trip.

  1. Get shallow clear storage bins. Instead of a suitcase use these; they’re stackable, see through, and organized. Space can get tight when you have multiple people, and weeks worth of stuff for everyone. These bins save space and are easily stacked on top of each other. I specified clear bins because, who remembers exactly where everything is? Being able to see into the bins not only helps you decide what to stack on top of what, but also keeps you from rummaging through a bin only to realize what you were looking for was somewhere else.
  2. Use a jacket as a pillow in the car. When you spend up to 15 hours in the car in a day you better be prepared to spend some of that time sleeping. Bringing something to rest your head on is imperative and will increase the quality of the time you spend on the road. Instead of bringing a pillow which takes up a lot of space and is bound to get dirty because of its inability to be compacted, bring a jacket. This will save space not only in the front seat, but will decrease the amount of stuff you have to shove into those bins.
  3. Figure out what the weather will be like the majority of your trip, and start there. Don’t try to pack for everything, bring a few universal pieces and a couple layers, but avoid packing things that make you think, “I should bring this just in case…”
  4. Bring snacks, and lots of them! When you are 3 hours from the nearest source of food you will be wishing you had something to munch on to pass the time. Depending on how long your drive is going to be, bring a cooler to store things like lunch meat, cheese, veggies, fruit etc. things you wont’t find but will be wishing you had 3 gas stations in.
  5. Fill your water bottle up everywhere you stop. Most days we take for granted how easily it is to refill, when you’re on the road and eating snacks, you will be bummed if you thought half a bottle could get you through the next stint of the drive. Point is, fill it up even if you don’t think you need to, you’ll be happy you did.
How To

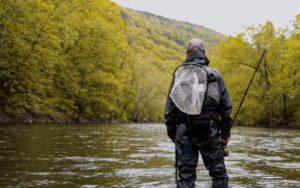
Have you ever been on a trip, be it with your family or significant other, and you wanted to wet some lines in a new or exotic area, but didn’t know where to begin?  Well then this is the article for you!  Here are 5 helpful tips for any angler looking to get started in an unfamiliar location.

  1. The Worldwide Web: The easiest way to gain fishing information is with a quick Google search.  While you may not stumble upon any super secret locations, this can be a great place to gain general knowledge about locations as well as flies and tackle.  Specifically look for recent blog posts or regularly updated local fishing reports.  Try to avoid any information that dates back more than a few years as conditions are constantly changing.


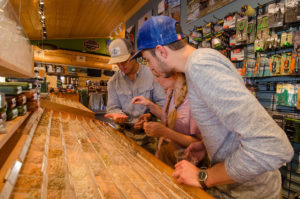
  1. Ask a Local: If you have the time, it is always a good idea to consult a local fly or tackle shop before heading out into unfamiliar waters.  Employees of these shops can be a wealth of information regarding local conditions and methods.  The shop may even offer guided trips if that is something you are interested in.  This is also a great one-stop option if you will be needing to purchase tackle or any licenses for the area.  One important thing to remember is that no one wants to give up their favorite fishing hole, or their second favorite… but if you are friendly and make a purchase in the shop to support the business, they may just give up their third favorite.

  1. Google Earth: The creation of google earth has been a game changer in the fishing world ever since its creation.  With this tool it is possible to see clear images of coastlines, structure, and even slightly submerged objects.  Additionally, google earth can provide clear visuals on drop-offs and gradual changes in depth.  While this tool is definitely more helpful for saltwater and lake fishing, this can also be a key tool for scouting out areas of good structure along river systems.  Google earth also gives users the ability to mark and save a location for future reference.  If you don’t already know what you are looking for the google earth option can be a bit confusing; however, if you already have a baseline knowledge of an area this can be a game changer for finding spots.


  1. Nautical Maps and Charts: If you find yourself unable to use the internet, there is always the old fashioned way.  This option relates mostly to marine or inshore fishing; however, this can also be a useful tool in larger lakes.  Nautical charts provide accurate coastline and depth data.  Similar to the google earth option, if you already have a baseline knowledge of methods and tackle for the area, this can be an incredibly helpful tool.  Most nautical charts will also identify reefs, semi-submerged rocks, and shipwrecks which are all great holding areas for many fish species.

  1. Explore: At the end of the day there is no better way to learn how to fish a new area than simply going out and fishing.  Anglers can be very secretive, and no one wants to expose their honey hole.  Though all of the options on this list are helpful tools, it takes time and practice to find the best areas and most effective methods.  That being said, you never know when you might stumble upon your own secret spot.